Create the SharePoint Online web part
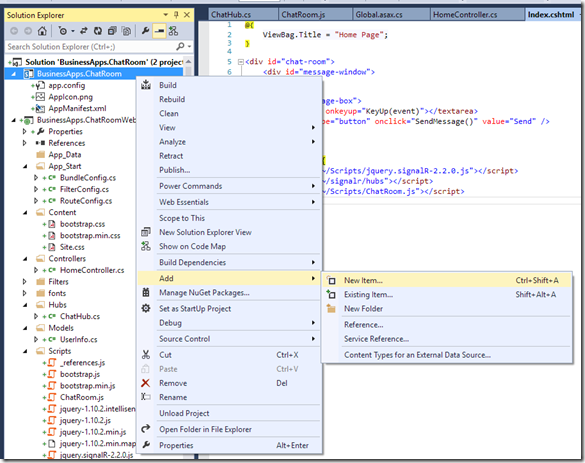
Start by right clicking on the ChatRoom app project (not the web project!) and selecting Add –> New Item…
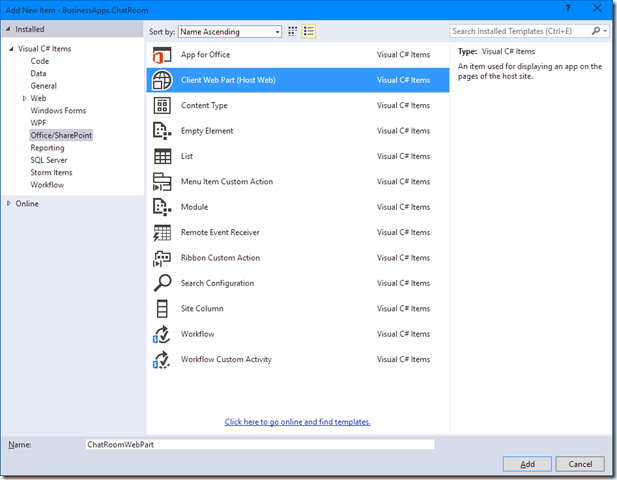
In the window that opens, select “Client Web Part (Host Web)”, change the name to “ChatRoomWebPart”, and click “Add”.
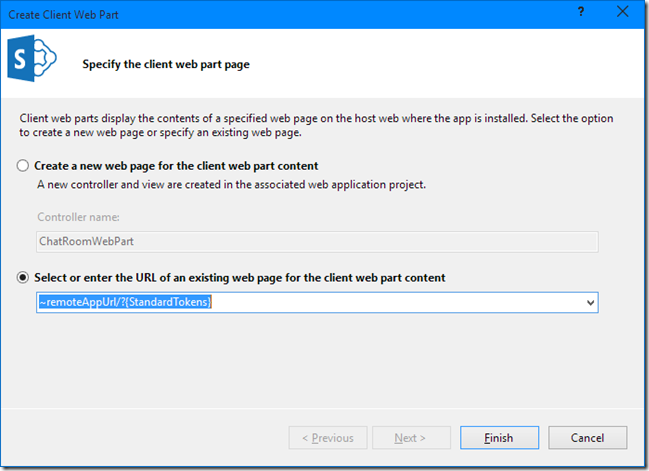
The next window gives us the option to create a new controller specifically for the web part or to just use an existing page. In this case, since we’ve already setup the HomeController to create our chat room, we’ll select “Select or enter the URL of an existing web page for the client web part content”, leaving the default value of “~remoteAppUrl/?{StandardTokens}”.
Visual Studio will create the web part and automatically open the Elements.xml file for the web part. In this XML file, we can change some of the details about the web part. In this case, we’re going to change the Title to “Chat Room”, the Description to “Chat Room powered by SignalR and Azure”, the DefaultWidth to 600 and the DefaultHeight to 800, like so:
And that’s all there is to creating the web part! Now we can F5 from Visual Studio again to re-deploy our app, again trusting the app if necessary.
Add the web part to a SharePoint Online site
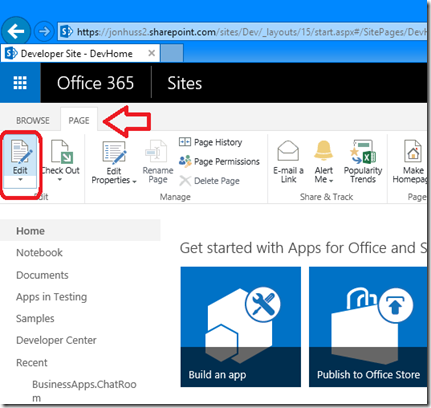
Now that the app has been redeployed, we can navigate to a page of our choosing to add the Chat Room web part. Once we make it to the page that we want to host the web part, we’ll click the ‘PAGE’ ribbon and then click Edit:
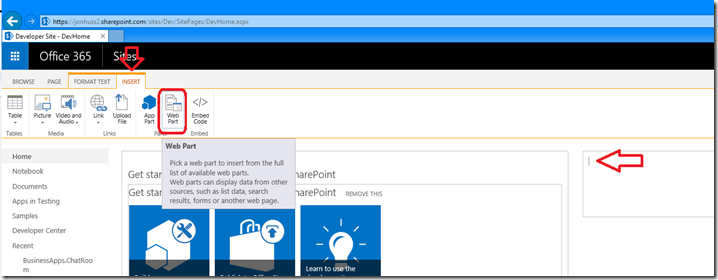
This will open the page in edit mode, allowing us to add the web part. First, click in one of the content areas on the page, then click the ‘INSERT’ ribbon and choose ‘Web Part’:
In the Web Part drop down, select ‘Chat Room’ and click Add. Note the description that we set appears here as well.
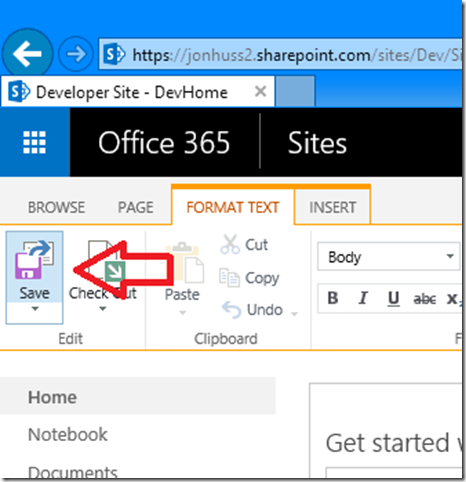
Finally, click Save to save the page:
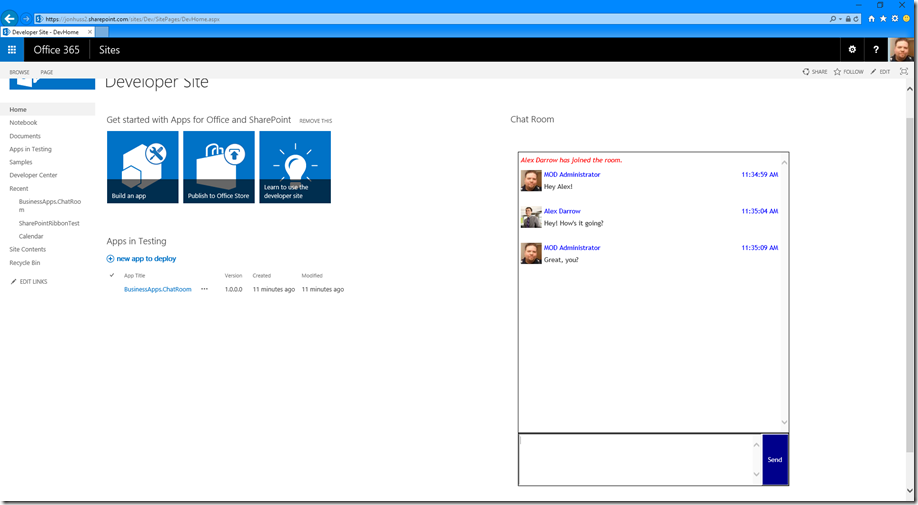
There we have it! A chat room that’s hosted in our SharePoint site! Go us!
Next we need to register our application in our SharePoint Online tenant so that SharePoint can access it from an external source (such as Azure!)
Register the app in SharePoint Online
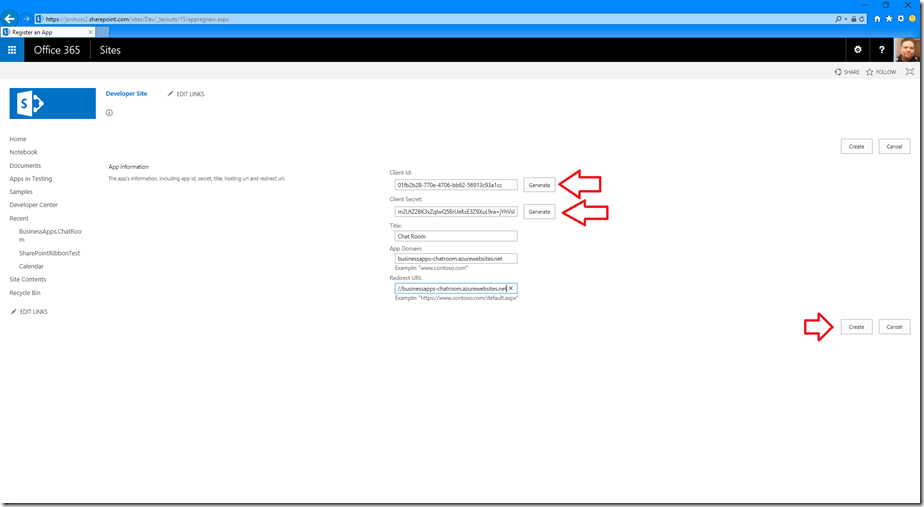
First, we need to register the application and then give it permissions so that it can run in SharePoint. To register the application, navigate to https://<site collection>/_layouts/appregnew.aspx. In my case, the full address is: https://jonhuss2.sharepoint.com/sites/Dev/_layouts/appregnew.aspx.
Click Generate the Client Id and the Client Secret. This will generate a key/secret pair that we’ll put into the web.config file for our site. Also provide a title for the application. Finally, we need to add an App Domain and a Redirect URI. Since we’ll be hosting this in Azure, we’re going to use the address “businessapps-chatroom.azurewebsites.net” and “https://businessapps-chatroom.azurewebsites.net”, respectively, and then click Create:
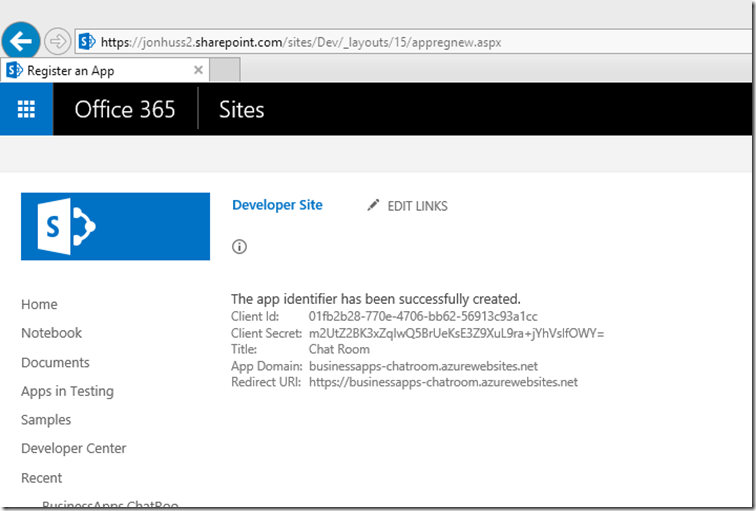
If all goes well, SharePoint will give us a message that the app identifier has been successfully created:
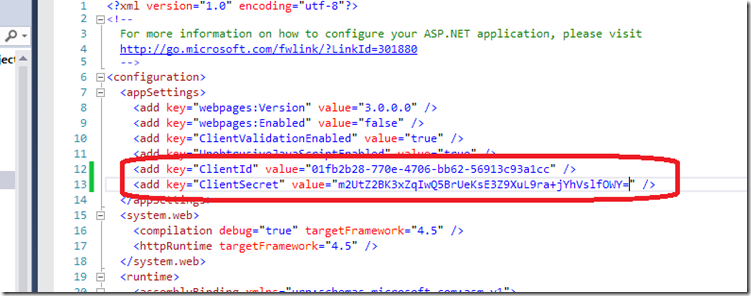
Then we’ll copy and paste the Id and Secret into our web.config file, like so:
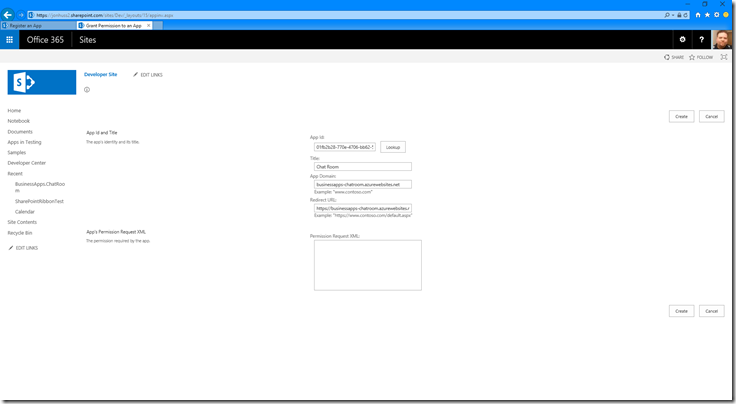
Now, back in SharePoint, navigate to https://<site collection>/_layouts/appinv.aspx. Copy and paste the ClientId from the previous step values into the App Id field and click Lookup:
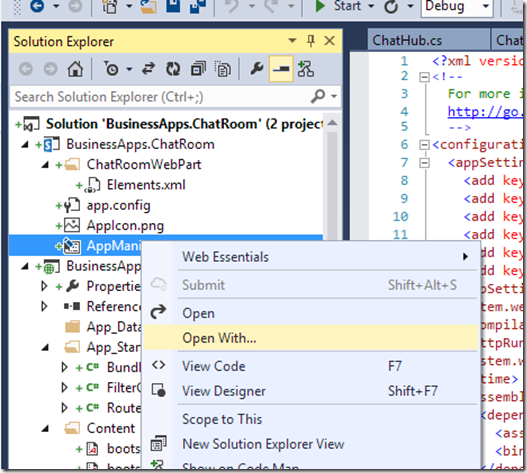
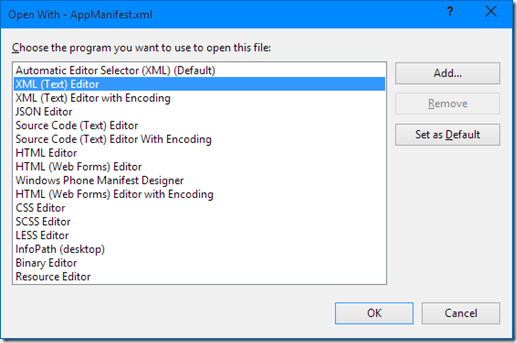
Now, go back to Visual Studio, find the AppManifest.xml file under the SharePoint app project, right click AppManifest.xml and select Open With……
In the window that opens, select “XML (Text) Editor” and click OK:
When the AppManifest.xml file opens, we’ll copy the <AppPermissionRequests> section to our clipboard:
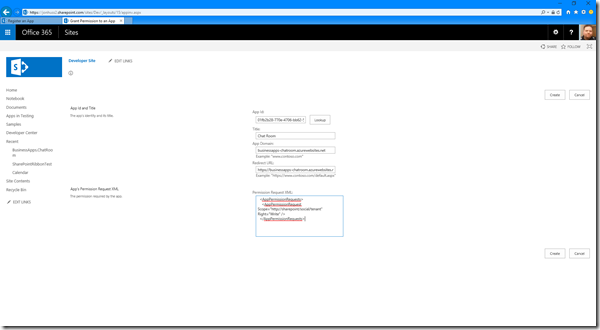
We’ll go back to our SharePoint site and paste that XML into the Permission Request XML field and Click Create:
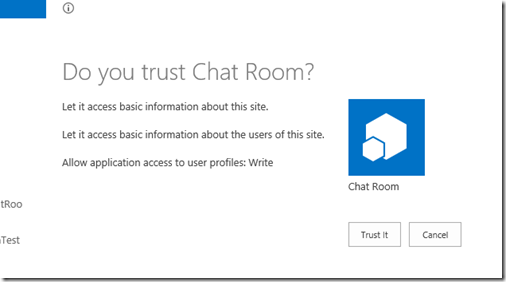
In the next window, just as we did in Visual Studio, trust the application:
The last few steps have created a ClientId and Secret for our application. This tells SharePoint which application is requesting permissions. Then, we explicitly gave the application the necessary permissions to read the user’s profile information.
Part 1: Create the SharePoint Online app and associated website
Part 2: Test the app in Visual Studio
Part 3: Create the SharePoint Online web part
Part 4: Deploy the site to Azure
